READ SMS only work with android. Follow this following steps to install this plugin in your ionic project.
Step-1
First you need to install Android Permission Ionic Native Plugin.
First you need to install Android Permission Ionic Native Plugin.
run these two commands first to install Android Permission Plugin.
ionic cordova plugin add cordova-plugin-android-permissions
npm install --save @ionic-native/android-permissions
Step-2
Add android-permissions to your app's Module.
import { AndroidPermissions} from '@ionic-native/android-permissions';


@NgModule({


  providers: [

    AndroidPermissions

  ]

})
export class AppModule { }
Step 3-
Now check or allow permission for Read SMS for android device goto the page where you want to allow permission for READ SMS and use this code sample.
import { AndroidPermissions } from '@ionic-native/android-permissions';


export class HomePage {
constructor(public androidPermissions: AndroidPermissions) { }


ionViewWillEnter()
{
this.androidPermissions.checkPermission(this.androidPermissions.PERMISSION.READ_SMS).then(
  success => console.log('Permission granted'),
err => this.androidPermissions.requestPermission(this.androidPermissions.PERMISSION.READ_SMS)
);

this.androidPermissions.requestPermissions([this.androidPermissions.PERMISSION.READ_SMS]);
}
}
Step-4
After allowing Read SMS permission now you need to install cordova-plugin-sms. Run this command for install it.
cordova plugin add cordova-plugin-sms
These are the following methods you can use for this plugin.
sendSMS(address(s), text, successCallback, failureCallback);

listSMS(filter, successCallback, failureCallback);

deleteSMS(filter, successCallback, failureCallback);

startWatch(successCallback, failureCallback);

stopWatch(successCallback, failureCallback);

enableIntercept(on_off, successCallback, failureCallback);

restoreSMS(msg_or_msgs, successCallback, failureCallback);

setOptions(options, successCallback, failureCallback);
To Read List of SMS:-
First declare var SMS:any; on top of your page. Also import Platform see in this code sample.
import { Component,  } from '@angular/core';
import { NavController,Platform } from 'ionic-angular';
declare var SMS:any;

@Component({
  selector: 'page-home',
  templateUrl: 'home.html'
})
export class HomePage {

  constructor(public platform:Platform) {

  }

ReadListSMS()
{

this.platform.ready().then((readySource) => {

let filter = {
       box : 'inbox', // 'inbox' (default), 'sent', 'draft'
       indexFrom : 0, // start from index 0
       maxCount : 10, // count of SMS to return each time
            };

       if(SMS) SMS.listSMS(filter, (ListSms)=>{

           console.log("Sms",ListSms);
          },

          Error=>{
          console.log('error list sms: ' + Error);
          });

    });
}
}
Make sure always use method in Ionic Framework inside the platform.ready() else it will not work.
To Read SMS on Arrive:-
First startWatch() watching for new messages the and when new message arrive onSMSArrive event is triggered. To read OTP SMS you can use this feature.
import { Component,  } from '@angular/core';
import { NavController,Platform } from 'ionic-angular';
declare var SMS:any;

@Component({
  selector: 'page-home',
  templateUrl: 'home.html'
})
export class HomePage {

  constructor(public platform:Platform) {

  }

ionViewDidEnter()
{

this.platform.ready().then((readySource) => {

if(SMS) SMS.startWatch(()=>{
           console.log('watching started');
        }, Error=>{
       console.log('failed to start watching');
   });

  document.addEventListener('onSMSArrive', (e:any)=>{
       var sms = e.data;
       console.log(sms);

       });

    });
}
}
To Send SMS-
import { Component,  } from '@angular/core';
import { NavController,Platform } from 'ionic-angular';
declare var SMS:any;

@Component({
  selector: 'page-home',
  templateUrl: 'home.html'
})
export class HomePage {

  constructor(public platform:Platform) {

  }

SendMySMS()
{

this.platform.ready().then((readySource) => {

if(SMS) SMS.sendSMS("+9112345","msg",()=>{
   console.log("Sent");
  }, Error=>{
   console.log("Error occurs")
  });
  });

    });
}
}
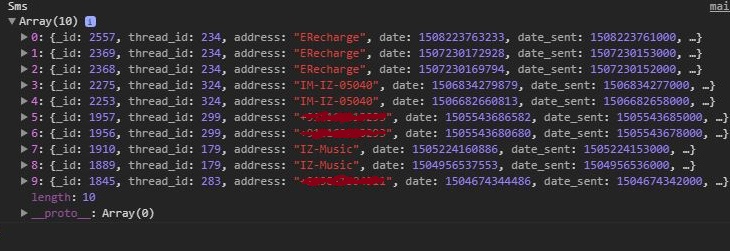
Read List of SMS OUTPUT:-