Using Cloud Firestore in Ionic 3 With AngularFire

Monday, 9 October 2017

Firebase has just announced  Firestore which is NOSQL document-based database. As compare to Firebase real time database in Firestore you can use simple and compound queries to fetch and retrieve the data.
In this tutorial we will learn how to integrate Firestore with Ionic 3. 
Follow these following easy steps.

Step-1

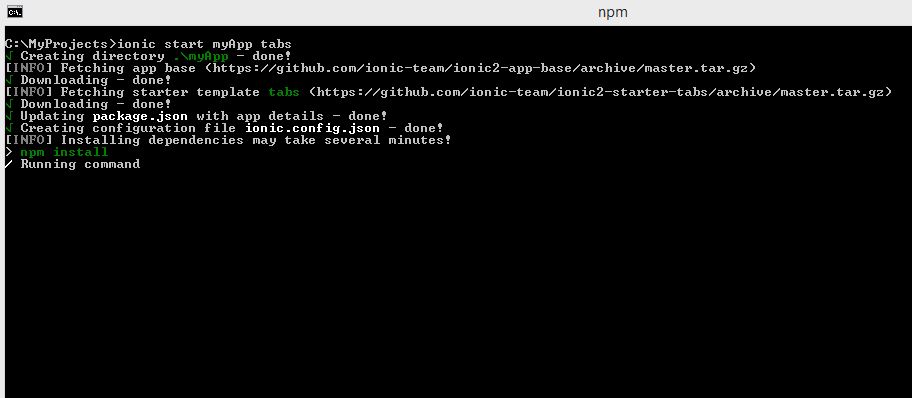
First you need to create a new project using Ionic CLI. If you don't know how to create new project using Ionic CLI please read this article  Set Up Development Environment for Ionic Framwork . Just open your terminal or command prompt. Create a project by using this command.


ionic start myApp tabs

If you have already created project then you can skip this step.


Step-2

Go to root directory of your project now you need to install Firebase package. Install angularfire 2 in your ionic project by using npm.


npm install angularfire2 firebase promise-polyfill --save


Step- 3

Now configure firebase in your application goto your firebase console and copy your API keys.
and  add both the AngularFireModule and AngularFirestoreModule to your app module.
See in the code sample.


import { AngularFireModule } from 'angularfire2';
import { AngularFirestoreModule } from 'angularfire2/firestore';

  export const firebaseConfig = {
     apiKey: "xxxxxxxxxxxxxxxxxxxxxxxxxxx",
     authDomain: "your-app.firebaseapp.com",
     databaseURL: "https://your-app.firebaseio.com",
     storageBucket: "your-app.appspot.com",
     messagingSenderId: "01234567891"
 };

@NgModule({
  declarations: [
    HomePage
  ],
  imports: [
    BrowserModule,
    IonicModule.forRoot(MyApp),
    AngularFireModule.initializeApp(firebaseConfig),
    AngularFirestoreModule.enablePersistence(),

  ],
  bootstrap: [IonicApp],
  entryComponents: [
    HomePage
  ],
  providers: [
    StatusBar,AndroidPermissions,
    SplashScreen,
    {provide: ErrorHandler, useClass: IonicErrorHandler}
  ]
})
export class AppModule {}

Here we call the enablePersistence method on the AngularFirestoreModule to automatically enable local caching which will allow the app to stay available while offline.

Step-4

Your firebase firestore configuration is now ready for use. Just import and use firestore on any page.


import { AngularFirestore } from 'angularfire2/firestore';
@Component({
  selector: 'page-hone',
  templateUrl: 'home.html'
})
export class HomePage {

  constructor(public navCtrl: NavController,public afs: AngularFirestore) {

  }

}

Create database reference and use AngularFirestore.

To Add documents to a collection

You can use the add() method to add a new document to a collection with a generated id.
Sample code


import { AngularFirestore } from 'angularfire2/firestore';
@Component({
  selector: 'page-hone',
  templateUrl: 'home.html'
})
export class HomePage {
constructor(public afs: AngularFirestore) {

const carsCollection = afs.collection<Item>('mycars');
   carsCollection.add({
    name: 'Abc',
    model: 'xyz',
    price: 10000
    }).then((added)=>{
console.log(added.id);
}).catch((e)=>{
console.log("Error",e);
})
  }

}

Retrieving collection data

There are multiple way to Retriving collection data from firestore.
If you just need the object data use valueChanges() method. With valueChanges() method  no document metadata is attached which makes it simple to render to a view.
snapshotChanges() method  returns an Observable of data as a DocumentChangeAction.
Sample code

import { AngularFirestore, AngularFirestoreDocument } from 'angularfire2/firestore';
import { Observable } from 'rxjs/Observable';
@Component({
  selector: 'page-hone',
  templateUrl: 'home.html'
})
export class HomePage {
private itemDoc: AngularFirestoreDocument<Item>;
  item: Observable<Item>;
  constructor(public navCtrl: NavController,public afs: AngularFirestore) {
 this.itemDoc = afs.doc<Item>('mycars');
    this.item = this.itemDoc.valueChanges();
  }

}

On Your HTML Page


     <div>
      {{ (item | async)?.name }}
    </div>

For  setting, updating, and deleting document data use set(), update(), delete() methods.
Reference is taken from https://github.com/angular/angularfire2
If you face any problem you can comment below. Thank You


How to Set Up Angular Development Environment

Thursday, 28 September 2017

Hi, If you are new in Angular or want to install Angular Development  environment in your system then your are at right place. Here you will learn step by step process to install Angular Development environment in your system.  So don't worry its a very easy task you have to do it only once and after that you can create and developed a lots of project in Angular.


Step-1

At First  you need to install Node.js in you system go to official site of  Node.Js download and install it in your system.


After successful installation  of Node.js to check its working or not Open terminal , or Command Prompt and type 'node --version '. This will show to installed version of node. Node.js setup comes with node package manager(npm) so to check npm version type 'npm --version'.


node --version


Step - 2

Now you need to install Angular CLI in your system just open your terminal or command prompt and type 'npm install -g @angular/cli'.


npm install -g @angular/cli


Its take some times to install in your system.After Successful installation of Angular CLI just type and 'ng --version' to check installed Angular CLI version or its working or not.


Step-3

Now you need to create Angular project.
type 'ng new MyProject'.


ng new MyProject


After running this command a projected directory is created with named MyProject  go to root directory of your project and type 'ng serve --open' to run  your project.


cd MyProject


ng serve --open


After running ng serve a localhost is started now open your browser and navigate to http://localhost:4200/ .


Ionic 3 Cordova Read SMS plugin

Sunday, 24 September 2017

READ SMS only work with android. Follow this following steps to install this plugin in your ionic project.

Step-1

First you need to install Android Permission Ionic Native Plugin.
run these two commands first to install Android Permission Plugin.


ionic cordova plugin add cordova-plugin-android-permissions

npm install --save @ionic-native/android-permissions

Step-2

Add android-permissions to your app's Module.
import { AndroidPermissions} from '@ionic-native/android-permissions';


@NgModule({
  

  providers: [
   
    AndroidPermissions
    
  ]
  
})
export class AppModule { }

Step 3-

Now check or allow permission for Read SMS for android device goto the page where you want to allow permission for READ SMS and use this code sample.


import { AndroidPermissions } from '@ionic-native/android-permissions';


export class HomePage {

constructor(public androidPermissions: AndroidPermissions) { }
ionViewWillEnter() {

this.androidPermissions.checkPermission(this.androidPermissions.PERMISSION.READ_SMS).then(
  success => console.log('Permission granted'),
err => this.androidPermissions.requestPermission(this.androidPermissions.PERMISSION.READ_SMS)
);

this.androidPermissions.requestPermissions([this.androidPermissions.PERMISSION.READ_SMS]);
}
}


Step-4

After allowing Read SMS permission now you need to install cordova-plugin-sms. Run this command for install it.

cordova plugin add cordova-plugin-sms

These are the following methods you can use for this plugin.

sendSMS(address(s), text, successCallback, failureCallback);

listSMS(filter, successCallback, failureCallback);

deleteSMS(filter, successCallback, failureCallback);

startWatch(successCallback, failureCallback);

stopWatch(successCallback, failureCallback);

enableIntercept(on_off, successCallback, failureCallback);

restoreSMS(msg_or_msgs, successCallback, failureCallback);

setOptions(options, successCallback, failureCallback);

To Read List of SMS:-

First declare var SMS:any; on top of your page. Also import Platform see in this code sample.

import { Component,  } from '@angular/core';
import { NavController,Platform } from 'ionic-angular';
declare var SMS:any;

@Component({
  selector: 'page-home',
  templateUrl: 'home.html'
})
export class HomePage {

  constructor(public platform:Platform) {

  }

ReadListSMS()
{

this.platform.ready().then((readySource) => {

let filter = {
       box : 'inbox', // 'inbox' (default), 'sent', 'draft'
       indexFrom : 0, // start from index 0
       maxCount : 10, // count of SMS to return each time
            };

       if(SMS) SMS.listSMS(filter, (ListSms)=>{

           console.log("Sms",ListSms);
          },

          Error=>{
          console.log('error list sms: ' + Error);
          });
     
    });
}
}

Make sure always use method in Ionic Framework inside the platform.ready() else it will not work.

To Read SMS on Arrive:-

First startWatch() watching for new messages the and when new message arrive onSMSArrive event is triggered. To read OTP SMS you can use this feature.


import { Component,  } from '@angular/core';
import { NavController,Platform } from 'ionic-angular';
declare var SMS:any;

@Component({
  selector: 'page-home',
  templateUrl: 'home.html'
})
export class HomePage {

  constructor(public platform:Platform) {

  }

ionViewDidEnter()
{

this.platform.ready().then((readySource) => {

if(SMS) SMS.startWatch(()=>{
           console.log('watching started');
        }, Error=>{
       console.log('failed to start watching');
   });

  document.addEventListener('onSMSArrive', (e:any)=>{
       var sms = e.data;
       console.log(sms);

       });
     
    });
}
}

To Send SMS-


import { Component,  } from '@angular/core';
import { NavController,Platform } from 'ionic-angular';
declare var SMS:any;

@Component({
  selector: 'page-home',
  templateUrl: 'home.html'
})
export class HomePage {

  constructor(public platform:Platform) {

  }

SendMySMS()
{

this.platform.ready().then((readySource) => {

if(SMS) SMS.sendSMS("+9112345","msg",()=>{
   console.log("Sent");
  }, Error=>{
   console.log("Error occurs")
  });
  });
     
    });
}
}

Read List of SMS OUTPUT:-


Reference is taken from gitHub https://github.com/floatinghotpot/cordova-plugin-sms/tree/master/docs 

If your are looking for Ionic V1 read this article http://www.programmingworldtech.com/2016/12/ionic-cordova-plugin-to-read-sms.html

If you are facing any problem comment below.Thank You.


Set Up Mobile App Development Environment for Ionic Framework

Thursday, 21 September 2017

Technology is growing very fast. Also development mode of Mobile application also changed. With very less effort now we can build cross platform mobile apps. Today there a lots of technology in the market like React Native, Ionic Framework, Native Script which gives us a environment to develop cross platform mobile apps which work on Android , ios like native apps.
Here we provide a complete guide to set up development environment for Ionic Framework.

What is Ionic Framwork?
Ionic is a open source framwork to build amazing cross platform mobile appps. Before staring Ionic framwork you should have knowledge of JavaScrict, Angular, TypeScript, HTML and CSS.
Visit Ionic Framwork official site.

Step-1

First of all we need to install Node.js in our system visit Node.js official site to download and install it.
To check successful installation of node.js open 'Command Prompt' if you are using windows or open 'Terminal' for 'MacOS' or 'Linux'.
and type 'node --version' and press enter button. This will show you installed version of node. Node.js comes with npm package you can also check npm package version by typing 'npm --v'.

Step-2

You need to install Ionic Framework in your system. Just open 'Command Prompt' or 'Terminal' and type 'npm install -g cordova ionic' and press enter.You can also individually install by typing 'npm install -g ionic' and 'npm install -g cordova'.

npm install -g cordova ionic
To check successful installation type 'ionic' and 'cordova'. This will show you install version of Ionic Framwork and cordova with description.

Step 3- 

Now create your first ionic app type 'ionic start myApp tabs'.


ionic start myApp tabs

After running this command a project directory is create with name "myApp". 


Now go to project directory and open project with your favorite code editor like Sublime text, Atom or Visual Studio code any one you can prefer.


This is folder structure of your ionic App. All your editable coding stuff is available in 'src' folder.
You can modify, add ,edit stuffs from 'src folder.

Step- 4

To run your app go to to your project directory using cmd or Terminal and just type 'ionic serve --lab'. This will show you web view of app in your browser.


ionic serve --lab


After running this command a dev server is start in your system. And Show you live preview of your application. 


If you face any problem to set up environment just freely comment below. Thank You.

C++ Program to delete a array element with a particular position

Wednesday, 20 September 2017


     #include<iostream.h>
     #include<conio.h>
     void main()
     {
     int n,a[10],i;
     int temp,j,pos;
     clrscr();
     cout<<"Enter n:\n";
     cin>>n;
     cout<<"Enter array\n";
     for(i=0;i<n;i++)
     cin>>a[i];
     cout<<"Enter position to delete element\n";
     cin>>pos;
     if(pos==n+1)
     cout<<"Deletion not possible:\n";
     else
     {
     for(i=pos-1;i<n-1;i++)
     a[i]=a[i+1];
     }
     cout<<"After deletion:\n";
     for(i=0;i<n-1;i++)
     cout<<"\n"<<a[i];
     getch();
     }

OUTPUT-

C Program to print a pyramid using *

Wednesday, 20 September 2017


#include<stdio.h>
#include<conio.h>
void main()
{
int i,k,j,n;
clrscr();
printf("Please Enter Size \n");
scanf("%d",&n);
for(i=1;i<=n;i++)
    {
    for(k=n-1;k>=i;k--)
       {
           printf(" ");
       }
     for(j=1;j<=2*i-1;j++)
       {
      printf("*");
      }
   printf("\n");
  }
  getch();
 }


OUTPUT-


Razorpay Integration with Ionic 3 and Angular 4

Saturday, 2 September 2017

Razorpay is provide payment solutions to online merchants. You can easily integrate with your application for payment solution.
Here we provide steps to integrate it with Ionic Framwork 3.

Step - 1

So, first of all install razorpay-cordova plugin plugin in your application.


cordova plugin add https://github.com/razorpay/razorpay-cordova.git --save

Step- 2

Inside the src folder create a file named delclation declaration.d.ts
put these following declaration  inside the declaration.d.ts

declare module '*';

declare var RazorpayCheckout: any;

Now your integrtation is ready to use.

Step-3

In your application goto page where you want to use Razorpay and use these code sample.


import { Component } from '@angular/core';

@Component({
  selector: 'page-home',
  templateUrl: 'home.html'
})
export class HomePage {
  pay() {
    var options = {
      description: 'Credits towards consultation',
      image: 'https://i.imgur.com/3g7nmJC.png',
      currency: 'INR',
      key: 'rzp_test_1DP5mmOlF5G5ag',
      amount: '5000',
      name: 'foo',
      prefill: {
        email: 'demo@email.com',
        contact: '1234567890',
        name: 'My Name'
      },
      theme: {
        color: '#F37254'
      },
      modal: {
        ondismiss: function() {
          alert('dismissed')
        }
      }
    };

    var successCallback = function(payment_id) {
      alert('payment_id: ' + payment_id);
    };

    var cancelCallback = function(error) {
      alert(error.description + ' (Error ' + error.code + ')');
    };

    RazorpayCheckout.open(options, successCallback, cancelCallback);
  }
}

Reference is taken from gitHub https://github.com/razorpay
If you are facing any problem comment below.Thank You.

C PROGRAM TO IMPLEMENT EDGE CHASING DEADLOCK DETECTION ALGORITHM

Saturday, 7 January 2017


#include<stdio.h>
#include<conio.h>
void main()
{
 int d[7][7];
 int i,j,n,a;
 int res;
 clrscr();
 printf("Enter the number of nodes\n\n");
 scanf("%d",&n);
 printf("Enter the elements of Dependency matrix");
 for(i=0;i<n;i++)
 {
   for(j=0;j<n;j++)
   {
  scanf("%d",&d[i][j]);
   }
  }
  d[0][1]=1;
  d[1][2]=1;
  d[2][3]=1;
printf("DEPENDECNY MATRIS IS:\n");
 for(i=0;i<n;i++)
 { for(j=0;j<n;j++)
  {
 printf("%d",d[i][j]);
  }
 }
  getch();
}

OUTPUT-


Page 1 of 14123...14
Related Posts Plugin for WordPress, Blogger...
 

Most Reading

Labels